Replacing innner/outer tie rods
 04-05-2013, 02:30 PM
#1
New Members
Thread Starter

Join Date: Jan 2013
Location: atlanta
Posts: 228
Likes: 0
Received 0 Likes
on
0 Posts
My Ride: 2005 545i Sport
2005 545i Sport with 100,000 miles.
I've now replaced all suspension/steering components that mate with the front wheel hub assemblies.
Control Arms (Wishbone & Tension Strut)
http://i41.photobucket.com/albums/e2...ps4c406c07.jpg
Struts (Shock Absorbers) & Strut Mount
Tie Rods.
I bought all tie rod items from Amazon.com, as they were the cheapest on a delivered basis by far:
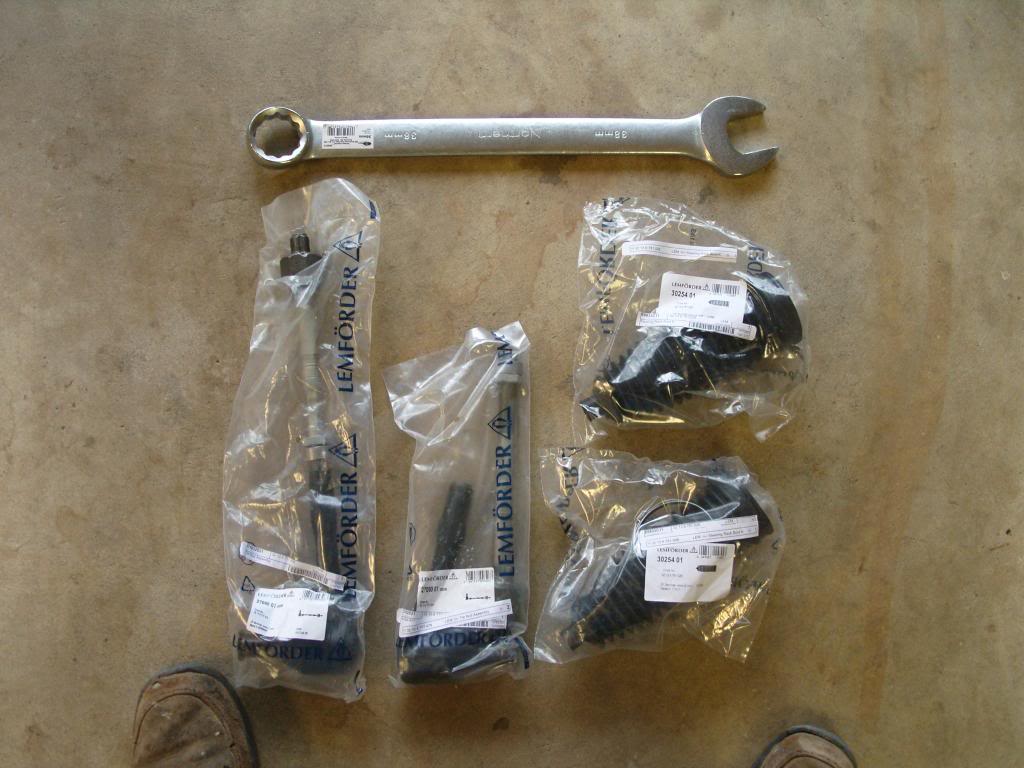
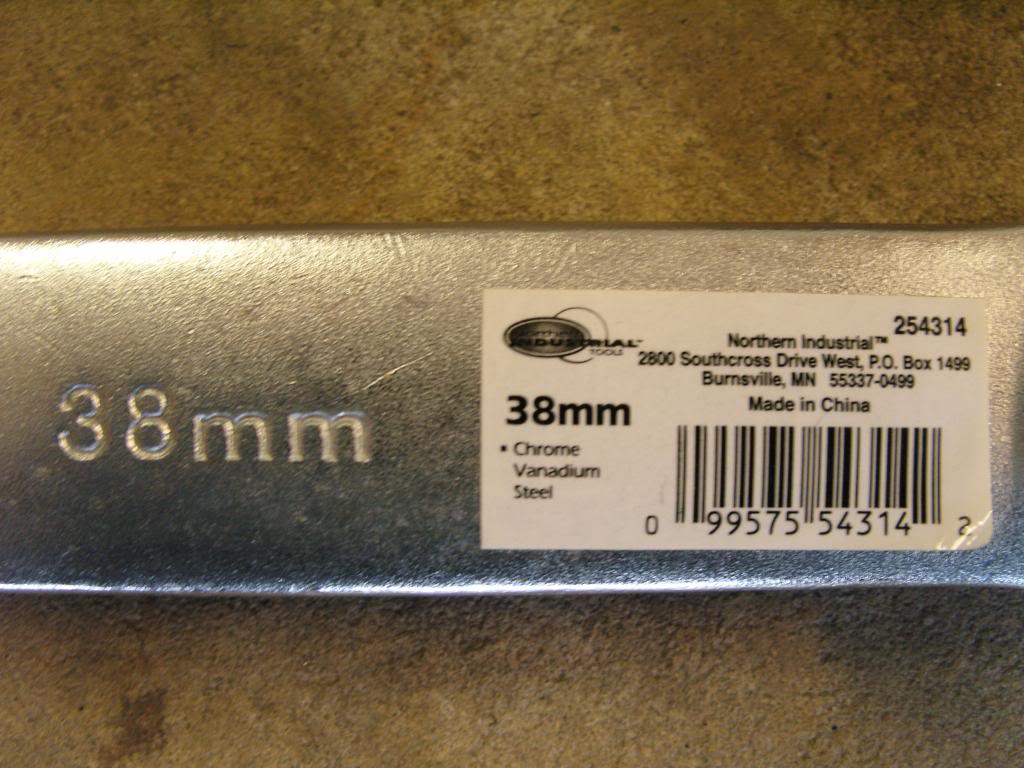
That huge 38mm (1 1/2") wrench came from Northern Industrial for $13. A 12" Crescent wrench is not able to accommodate a 38mm nut.
All of these components exhibited wear (play/looseness) of 30 - 50% of new OEM parts.
I will now have the car aligned at my local BMW dealership (Global BMW) that has 2 year old Hunter equipment designed specifically for BMW's at a cost of $129.00 for a 4 wheel alignment.
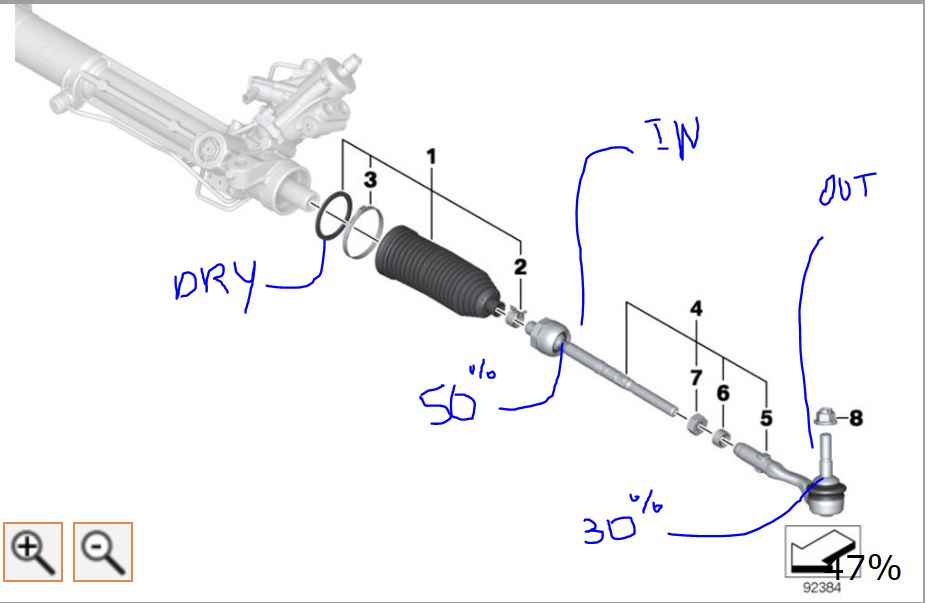
The tie rods (inner & outer) exhibited wear as follows: Inner Tie Rod: 50% looser than new, and the outer at 30%. (Opposite to what I had expected.) Therefore, I think it's a mistake to simply replace the outer tie rod but not the inner.
Here's how I replaced the inner/outer tie rods:
1. Chock the rear wheels and apply parking brake.
2. Center the steering wheel.
3. Loosen the wheel lugs.
4. Jack the car at the central jacking point 24" in from the bottom of the front bumper. Jack it up quite high because you'll be using a 38mm hand wrench that is over 16" long and it will need access to torque the nut.
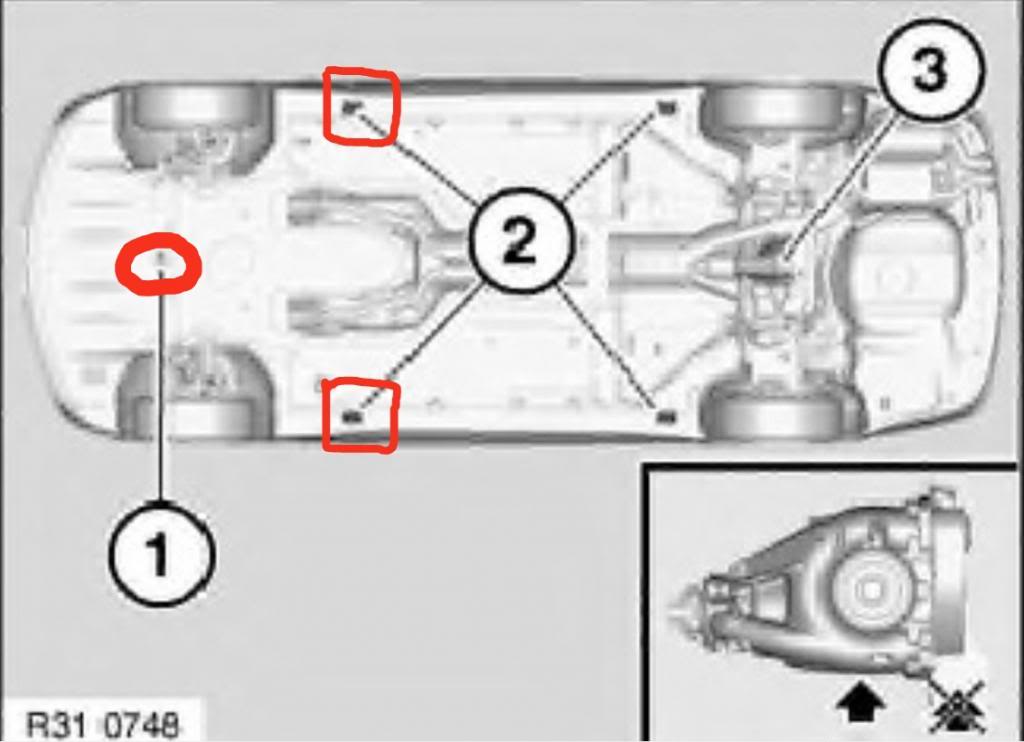
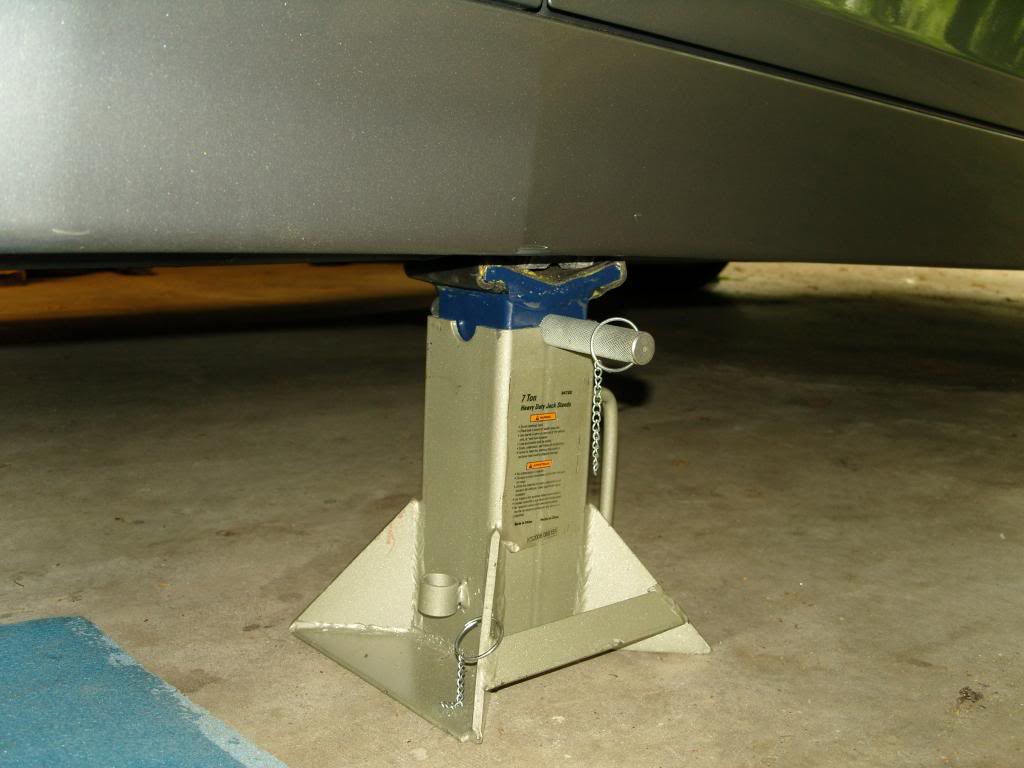
5. Place 7 ton jack stands under the passenger & drivers doors jack point pads.
6. Remove both wheels, clean and set aside.
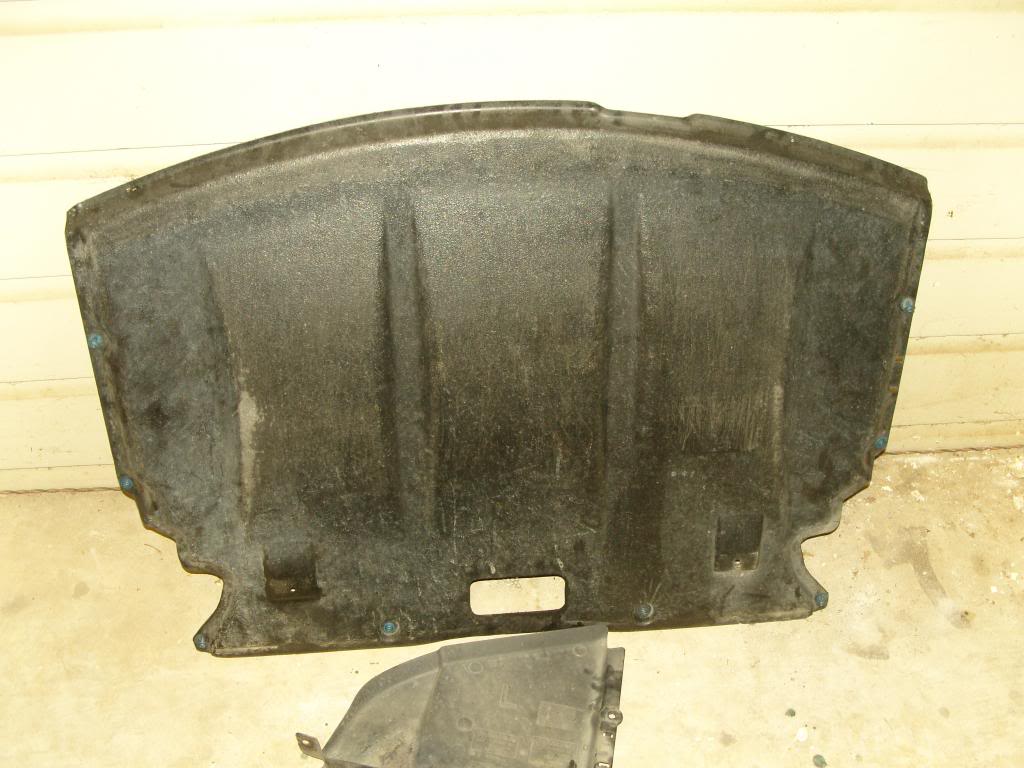
7. Remove the front under belly engine panel and set aside. (Phillips screw driver releasing 1/4 turn screws)
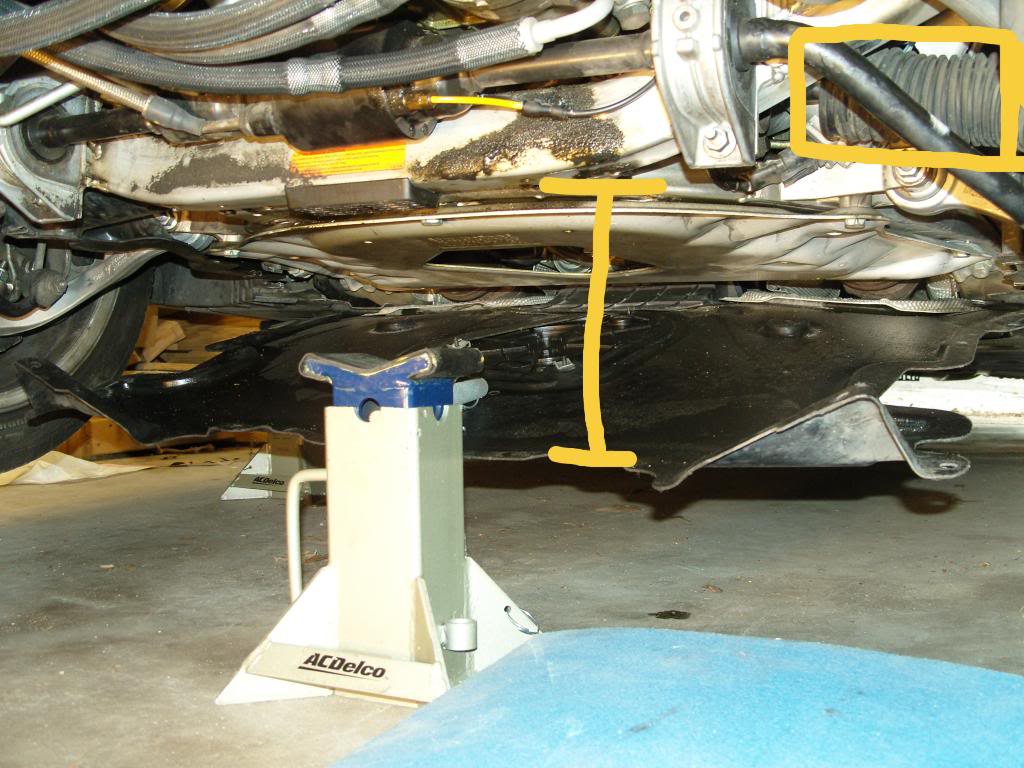
8. Removed the 8mm screws from the second under belly panel up to the transmission and held it down towards the ground:
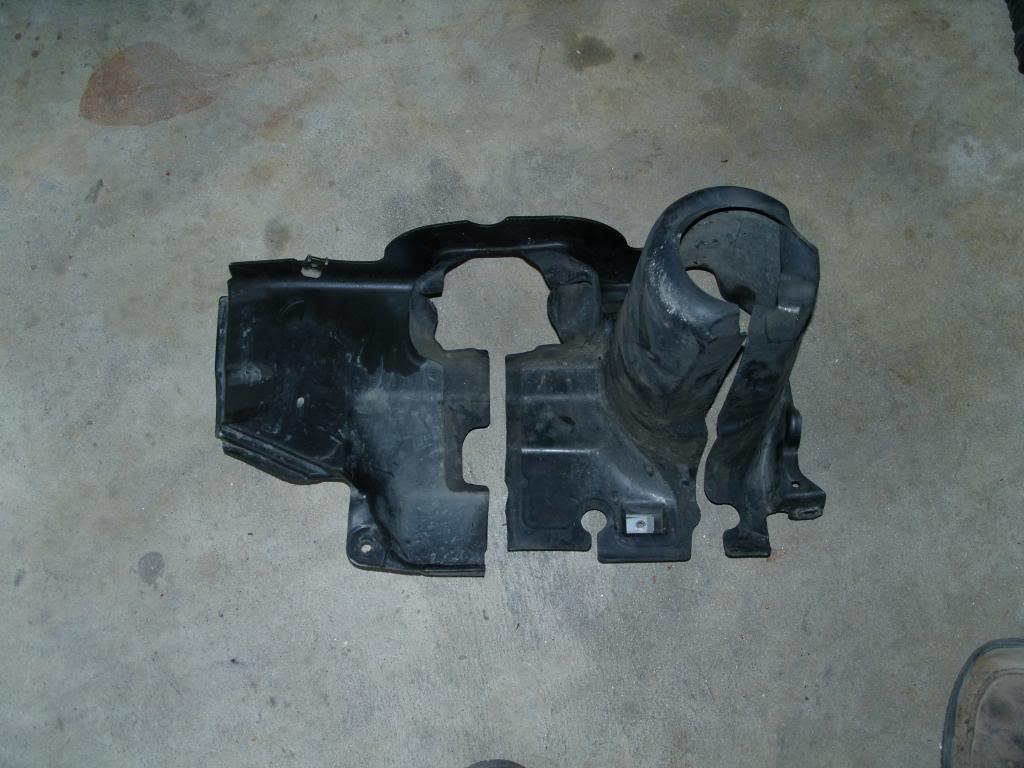
9. Remove (8mm hex screws) the lower, inner wheel well, panel:
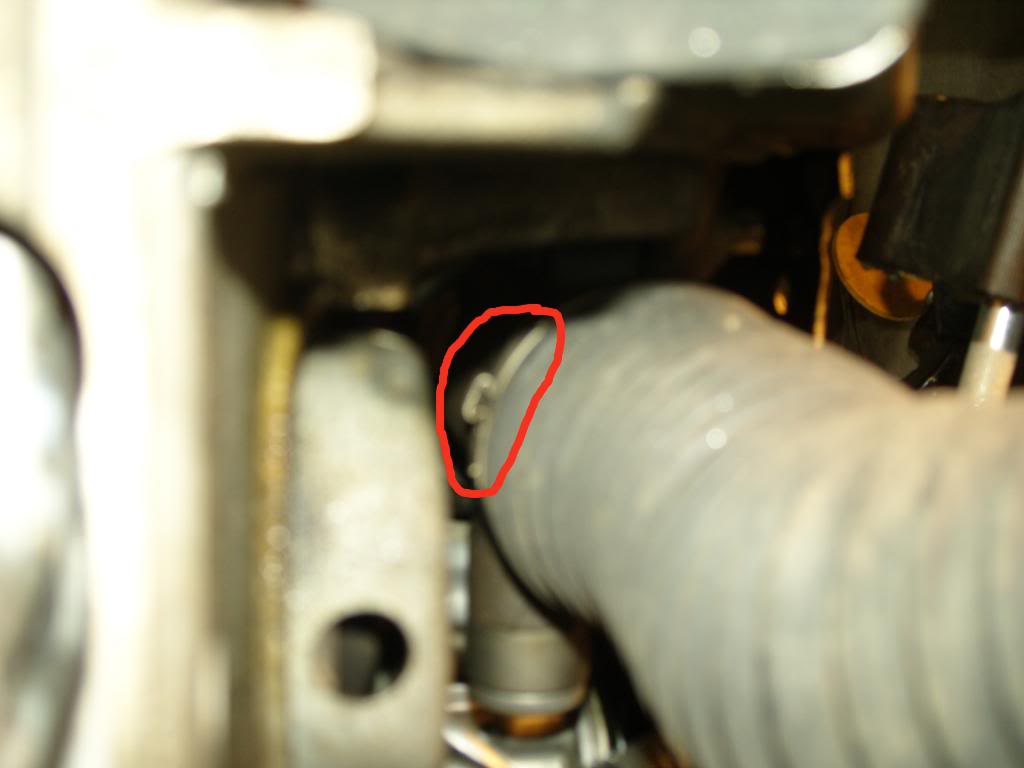
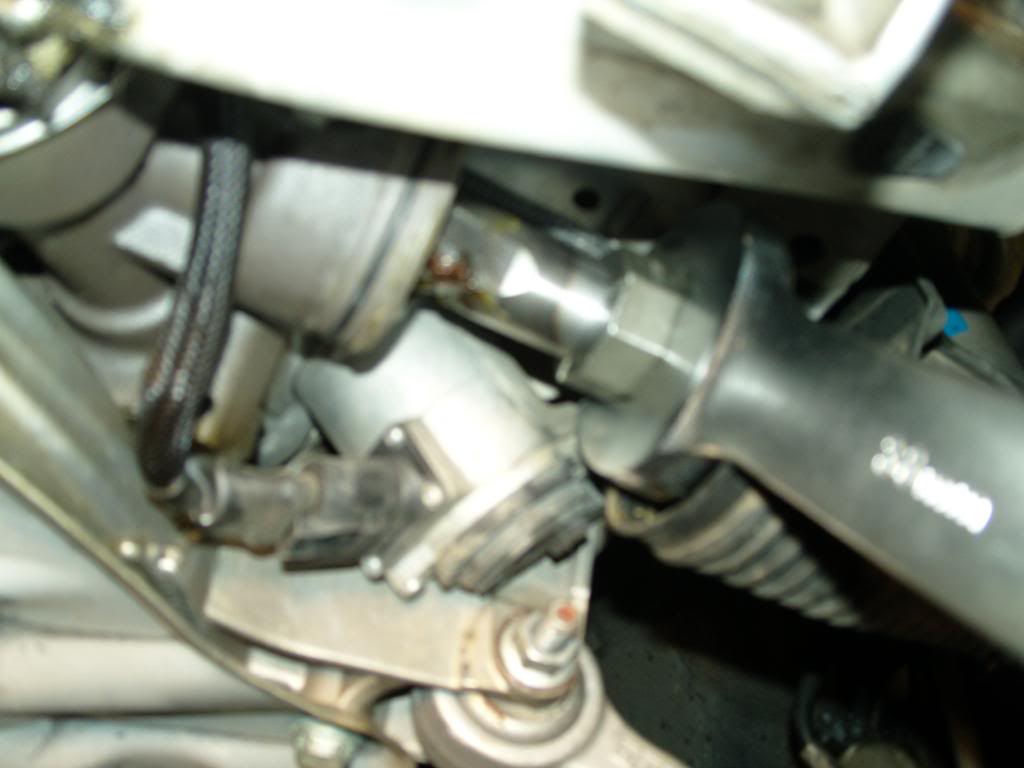
10. Using a long, thin, standard screwdriver, I pried loose the ear clamp holding the rubber bellows to the steering mechanism:
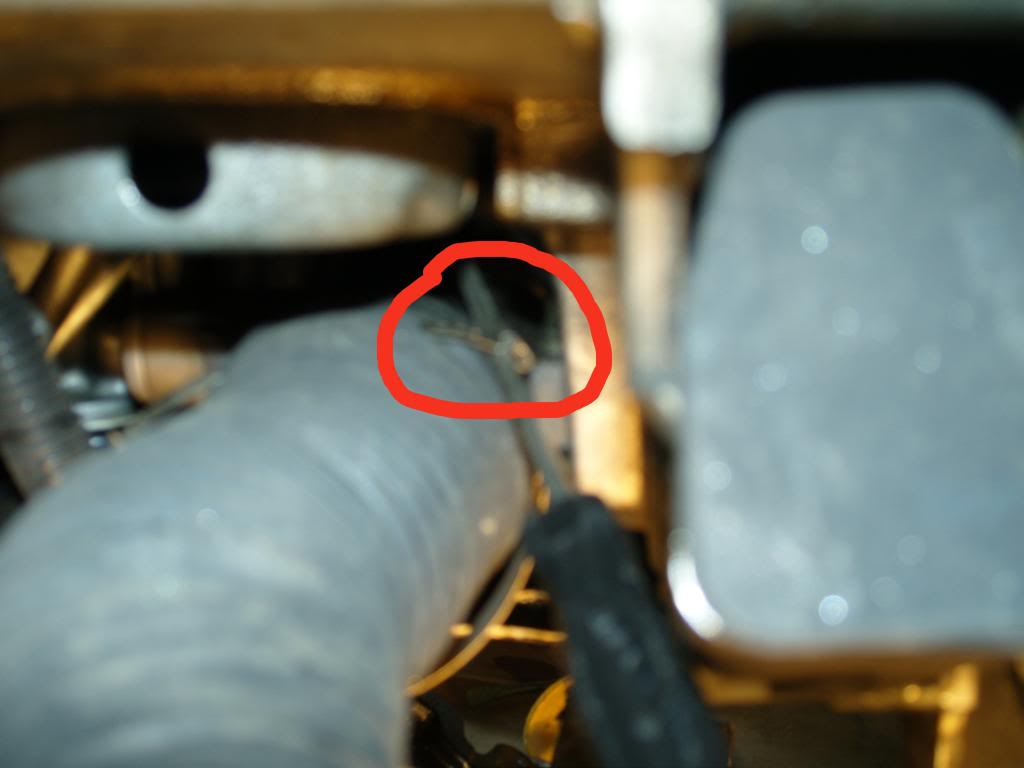
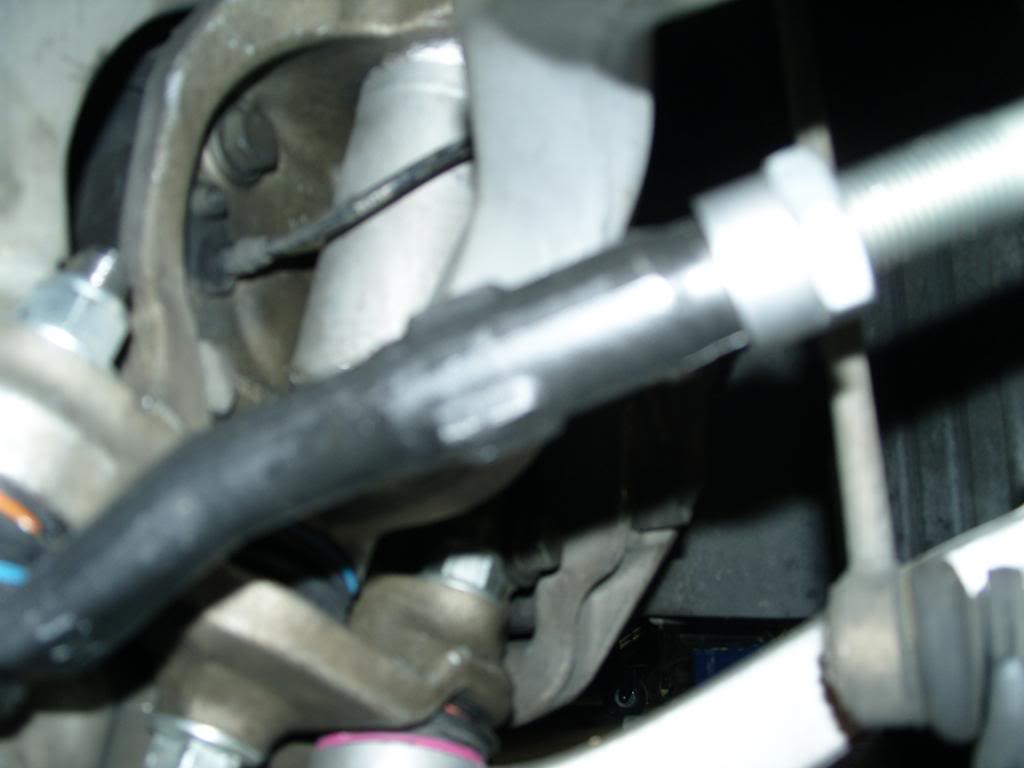
11. Pulled the bellows off of the steering module.
That gives you clear access to the 38mm nut.
12. Released the spring clamp holding the other end of the bellows to the tie rod shaft:
13. Using a 1/2" breaker bar, and 21mm standard socket, I broke loose the nut holding the tie rod to the hub assembly. (It's torqued to 122 lbs; so some force is needed) Harbor Freight need not apply, as their socket cracked under the pressure, while Lowes - Kobalt, handled it with ease.
14. Loosen the nut until it's flush with the top of the threaded stud and then hit it with a steel mallet (not a hammer although it will due) until it releases. (Avoid penetrating lubricant unless it won't release).
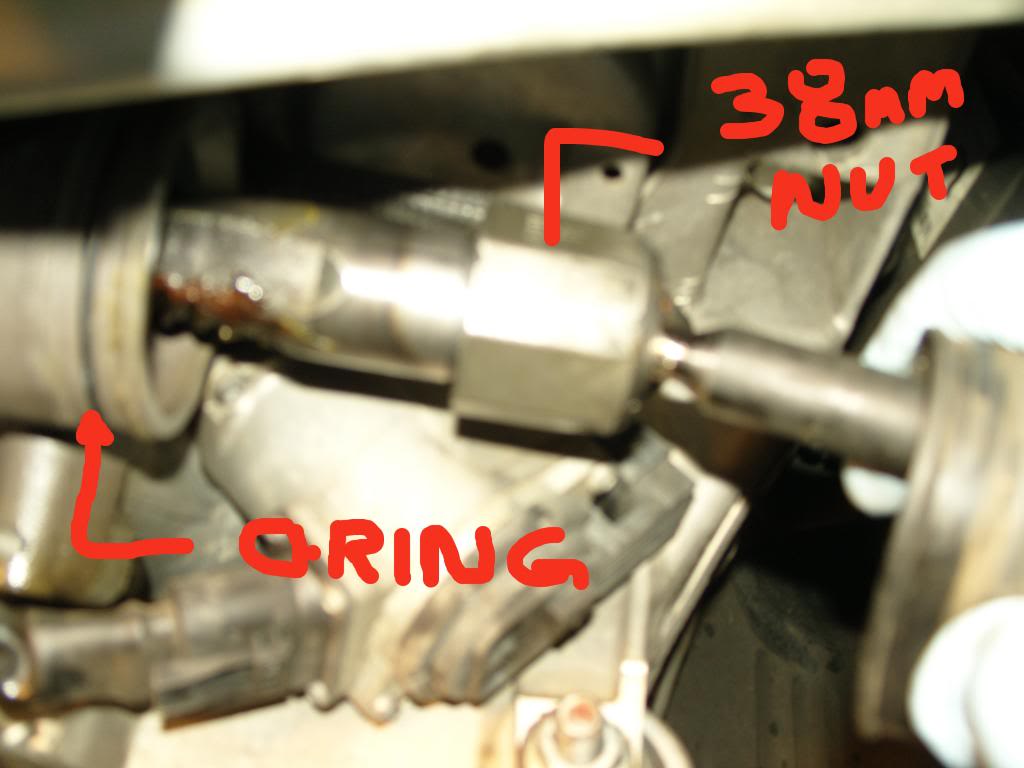
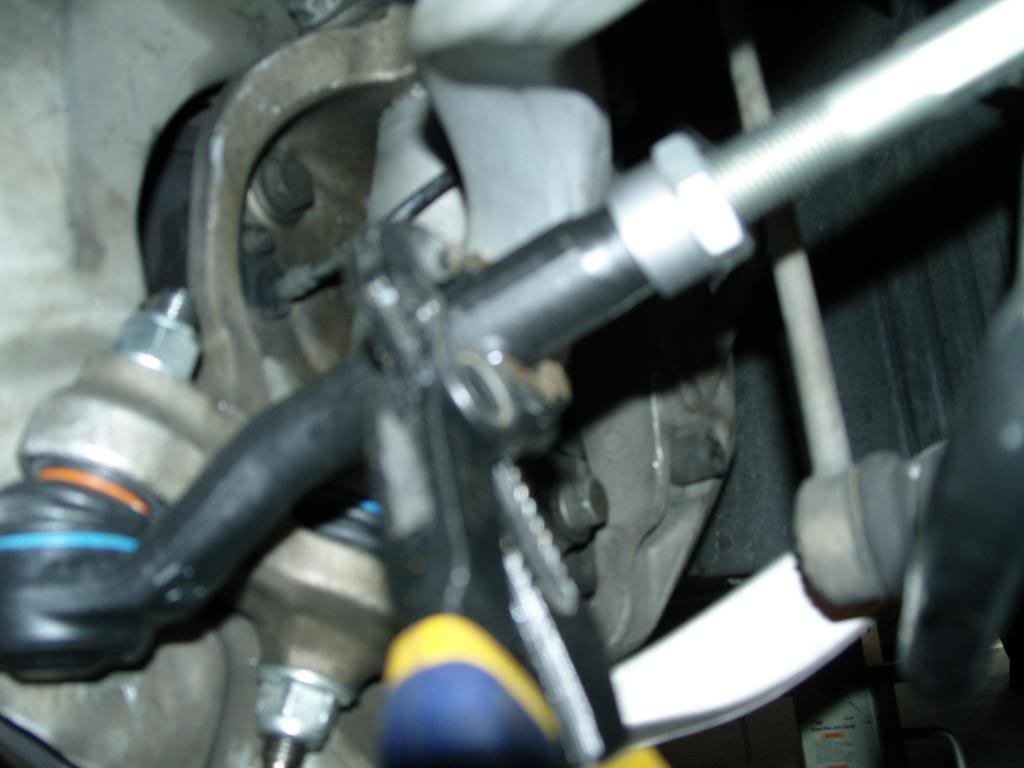
15. Using a 38mm hand wrench ($13 at Northern Hydraulics) , loosen the nut holding the tie rod assembly to the steering module. Switch to a smaller locking jaws plier once released to complete the removal. (A 38mm wrench is a long beast that needs a lot of room to maneuver.) A 12" Crescent wrench is not big enough to span 38mm.
16. Remove the nut from the outer tie rod at the hub (BMW calls this a swivel bearing (???)
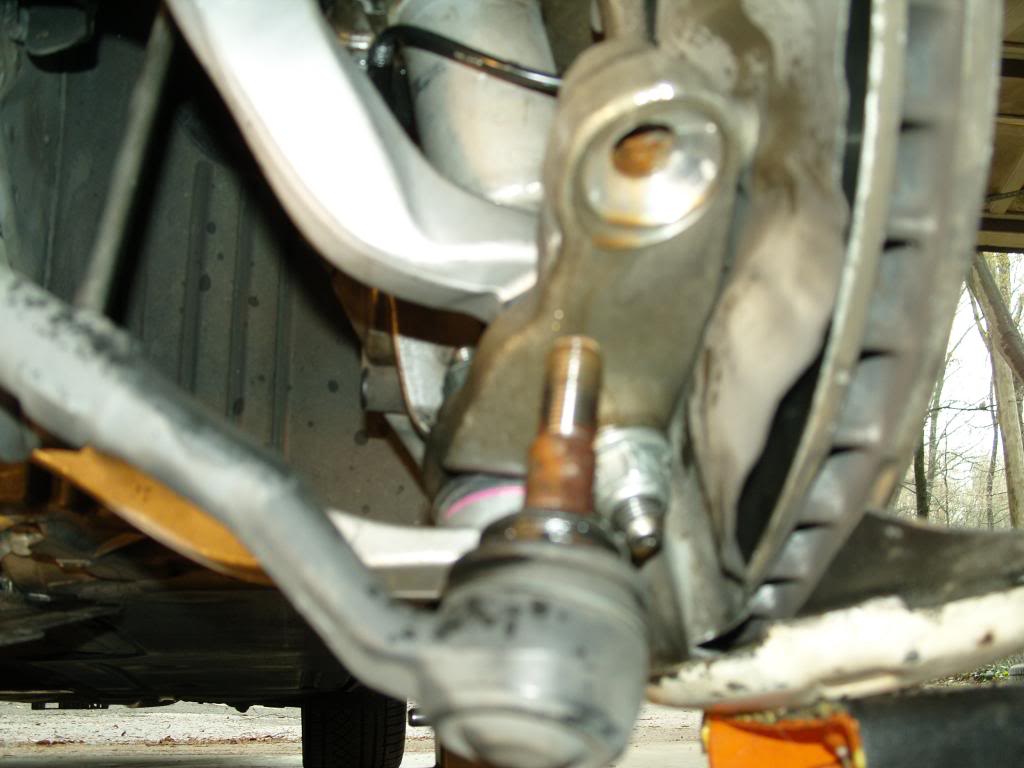
Clean out this mating surface so it is free of rust, oil, grease, etc.
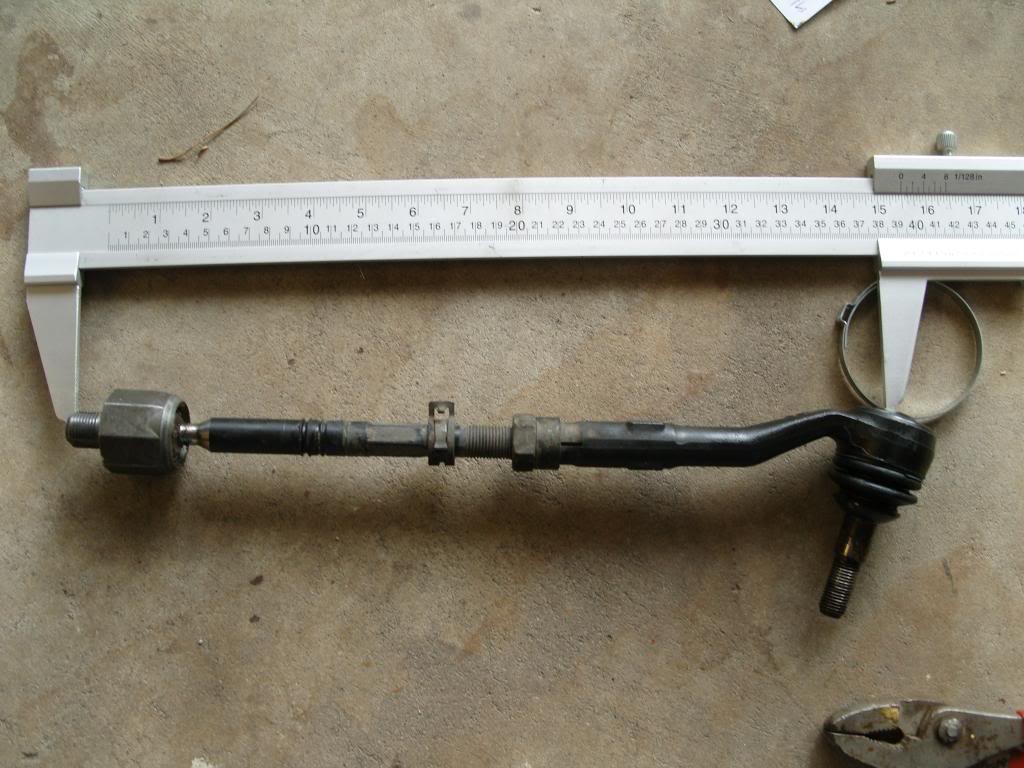
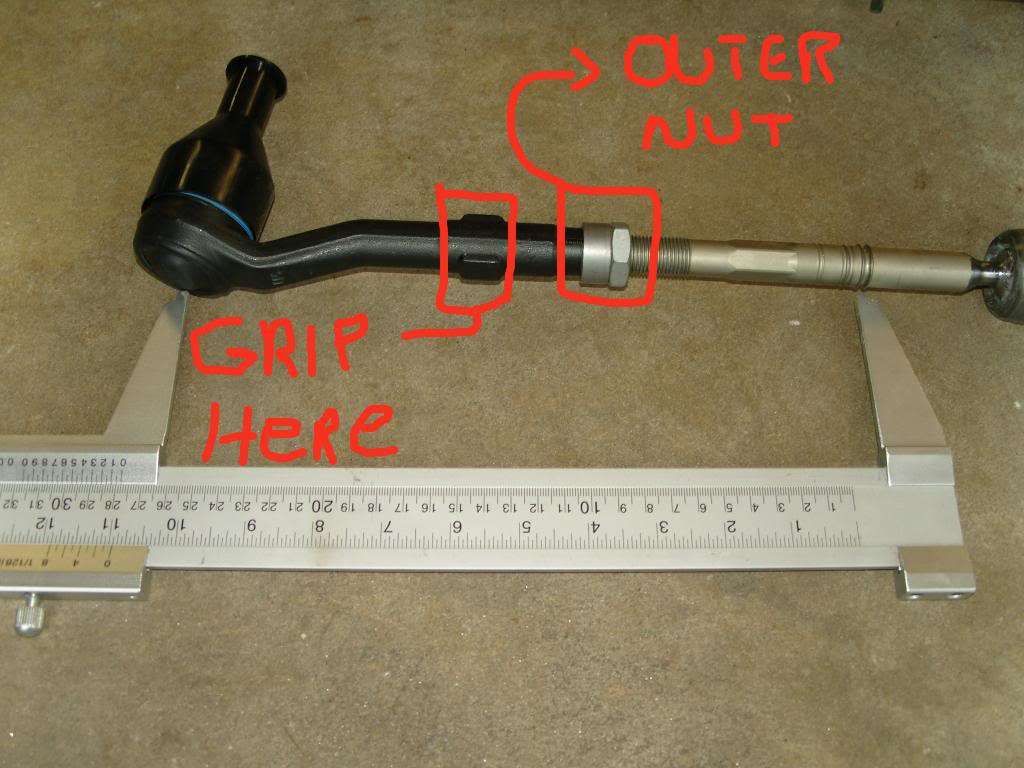
17. Now lay the removed tie rod assembly on the ground to take measurements. I used a $10 Northern Hydraulics caliper to measure as shown:
18. Assemble the new tie rods, placing the bellows and quick release clamp on the shaft before screwing the outer tie rod onto the inner tie rod.
19. Using your measurement from the old assembly, match to the new and tighten the tie rod shaft nut securely.
20. Clean up the steering rack gear and grease it.
21. Remove the old O-Ring and replace with the new one.
22. Now install the new tie rod assembly by barely securing the ball joint end into the wheel hub assembly.
23. Now carefully line up the inner tie rod nut with the steering module and tighten. (This is a bit cumbersome since the bellows wants to cover the nut area.)
You can turn the wheel hub assembly by hand inwards towards the vehicle to obtain the needed distance)
24. Take your time, and make sure not to cross thread the nut into the steering module. Now take your 38mm wrench and tighten until no play is remaining. (Should be torqued to 81 lbs but I couldn't measure since a torque wrench cannot be used).
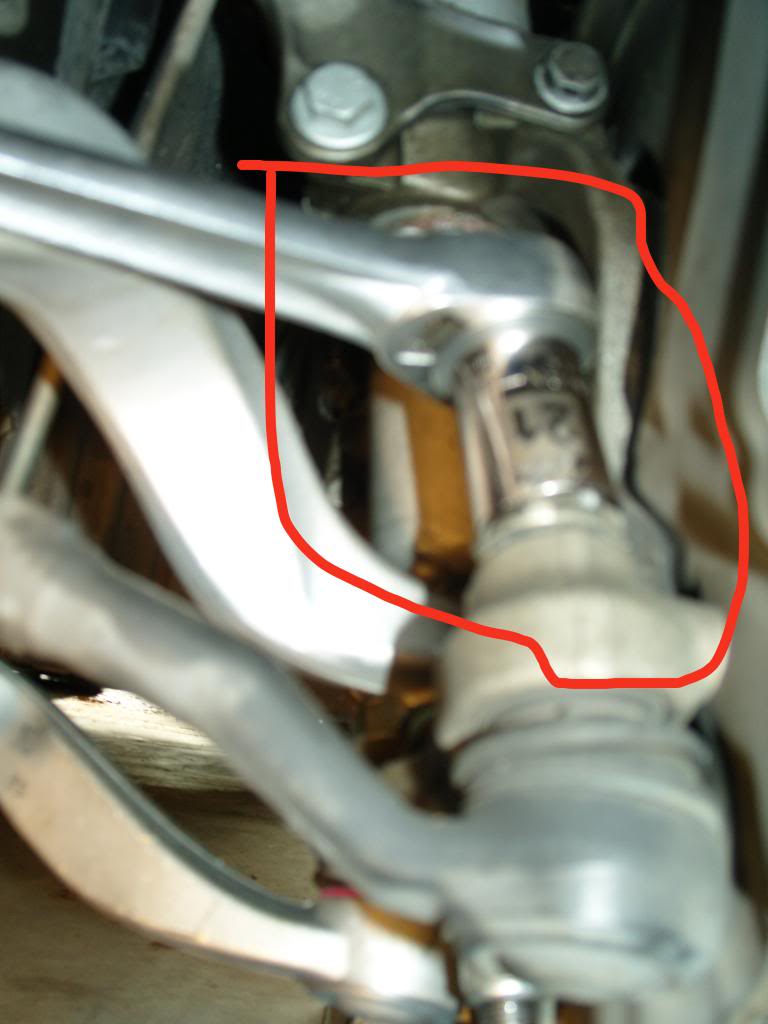
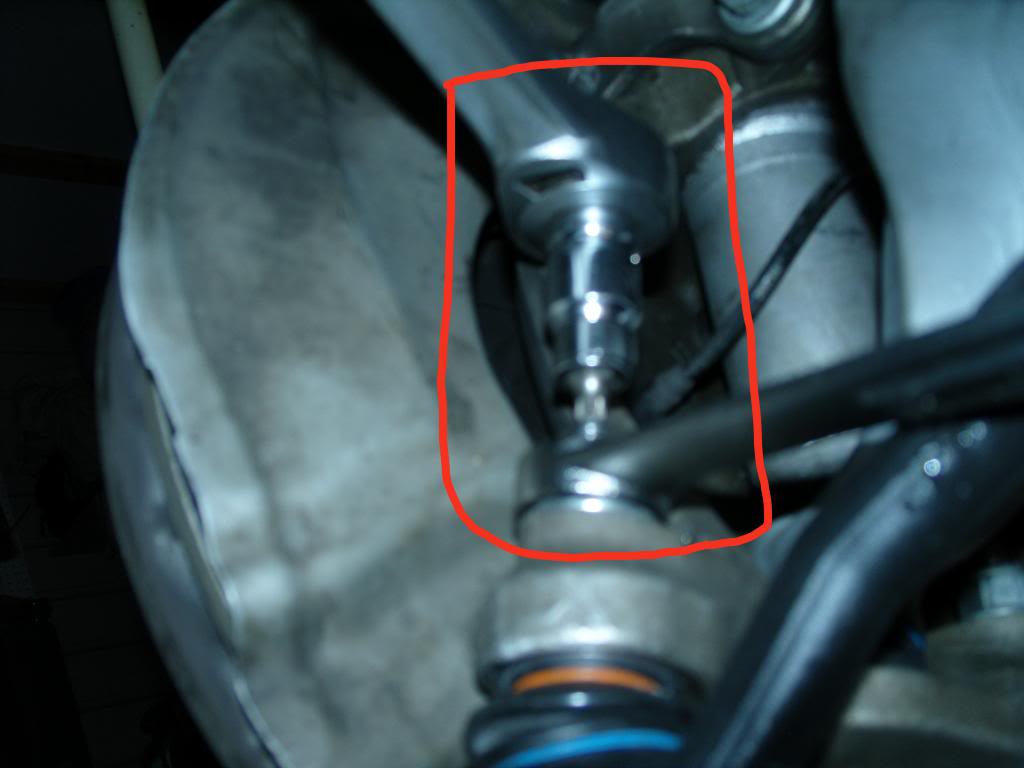
Look for the area on the tie rod that you can grip with a locking or handheld jaws type pliers while torqueing either the inner or outer nuts as shown:
Remember that the car will need an alignment and the outer nut will be loosened to make adjustments. It's the 38mm, inner nut, that will not be messed with at alignment time.
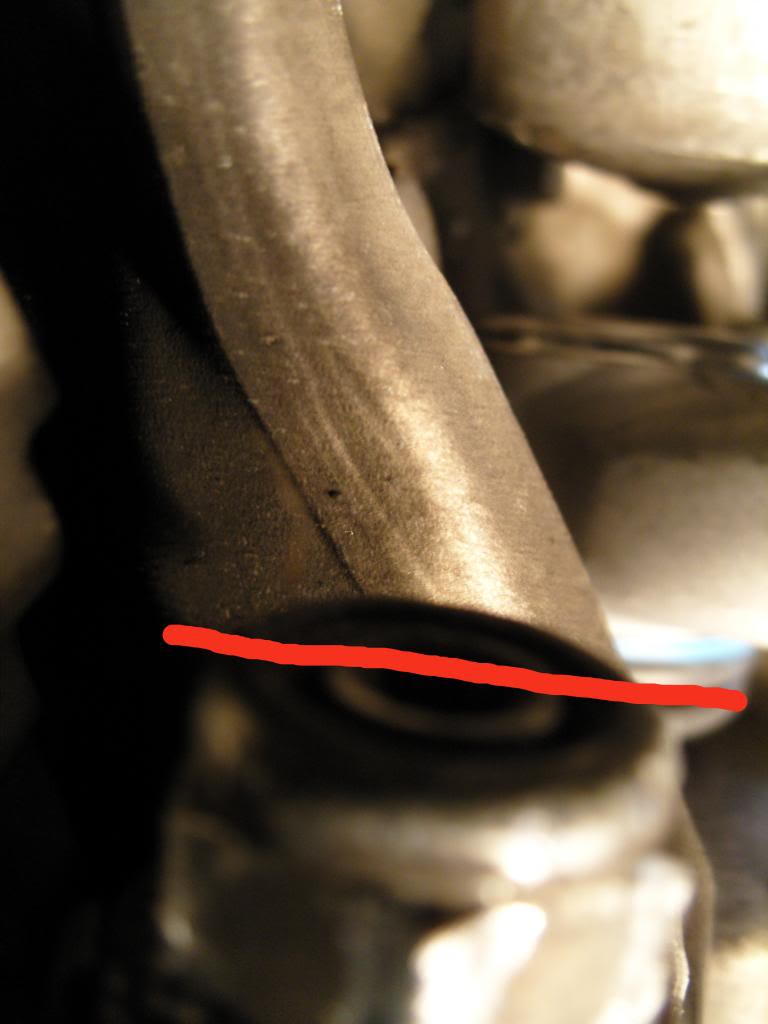
25. Now spray the o-ring area on the steering module with Sea Foam or other penetrating lubricant.
26. Force the rubber bellows over the o-ring and make triple sure that it is fully and correctly seated. The Sea Foam greatly aids in making this possible; so use it.
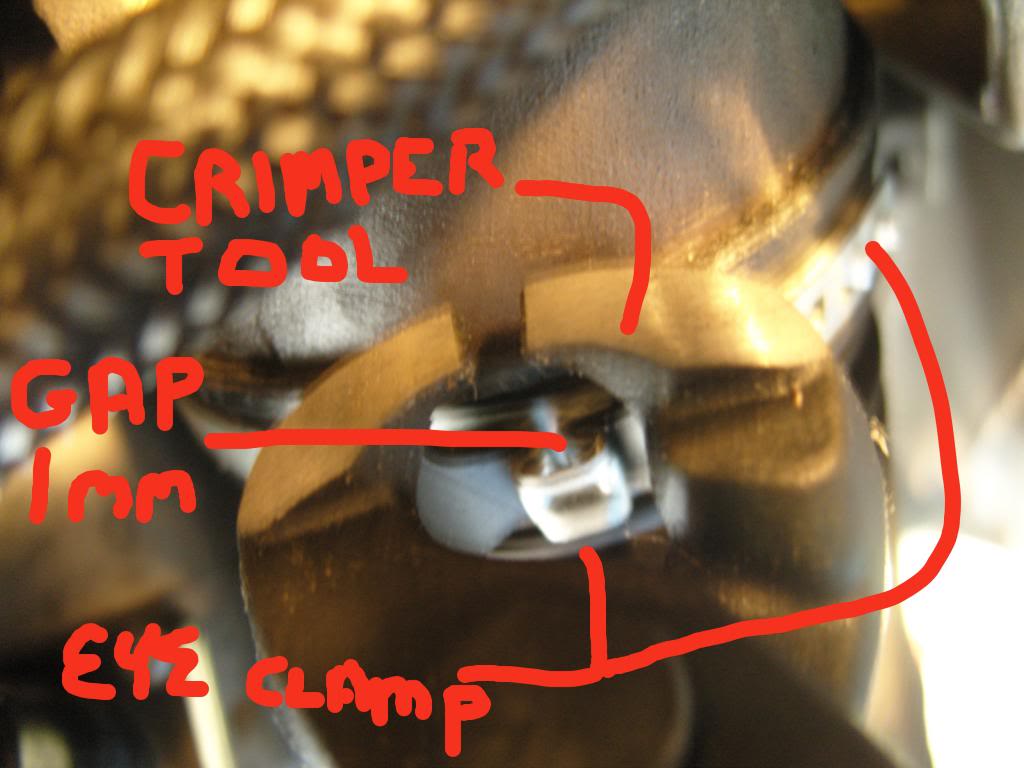
27. Now take the ear clamp and place it over the bellows and cinch it into place using a crimper (Oetiker is what I used) to lock the rubber bellows in place and prevent any dirt from entering. (The gap in the crimp should be less than 1mm) This is a critical step to preventing dirt from wearing out your steering mechanism.
28. Now tighten the nut on the outer tie rod using a 21mm box wrench,T40 socket; and holding the nut with the 21mm box wrench, tighten with the T40 socket (counter clockwise) until it will not take any more torque. Now switch to your torque wrench and 21mm socket and finalize to 122 lbs of torque.
29. Reinstall under belly panels and you're done.
I've now replaced all suspension/steering components that mate with the front wheel hub assemblies.
Control Arms (Wishbone & Tension Strut)
http://i41.photobucket.com/albums/e2...ps4c406c07.jpg
Struts (Shock Absorbers) & Strut Mount
Tie Rods.
I bought all tie rod items from Amazon.com, as they were the cheapest on a delivered basis by far:
That huge 38mm (1 1/2") wrench came from Northern Industrial for $13. A 12" Crescent wrench is not able to accommodate a 38mm nut.
All of these components exhibited wear (play/looseness) of 30 - 50% of new OEM parts.
I will now have the car aligned at my local BMW dealership (Global BMW) that has 2 year old Hunter equipment designed specifically for BMW's at a cost of $129.00 for a 4 wheel alignment.
The tie rods (inner & outer) exhibited wear as follows: Inner Tie Rod: 50% looser than new, and the outer at 30%. (Opposite to what I had expected.) Therefore, I think it's a mistake to simply replace the outer tie rod but not the inner.
Here's how I replaced the inner/outer tie rods:
1. Chock the rear wheels and apply parking brake.
2. Center the steering wheel.
3. Loosen the wheel lugs.
4. Jack the car at the central jacking point 24" in from the bottom of the front bumper. Jack it up quite high because you'll be using a 38mm hand wrench that is over 16" long and it will need access to torque the nut.

5. Place 7 ton jack stands under the passenger & drivers doors jack point pads.

6. Remove both wheels, clean and set aside.
7. Remove the front under belly engine panel and set aside. (Phillips screw driver releasing 1/4 turn screws)

8. Removed the 8mm screws from the second under belly panel up to the transmission and held it down towards the ground:
9. Remove (8mm hex screws) the lower, inner wheel well, panel:
10. Using a long, thin, standard screwdriver, I pried loose the ear clamp holding the rubber bellows to the steering mechanism:
11. Pulled the bellows off of the steering module.
That gives you clear access to the 38mm nut.
12. Released the spring clamp holding the other end of the bellows to the tie rod shaft:
13. Using a 1/2" breaker bar, and 21mm standard socket, I broke loose the nut holding the tie rod to the hub assembly. (It's torqued to 122 lbs; so some force is needed) Harbor Freight need not apply, as their socket cracked under the pressure, while Lowes - Kobalt, handled it with ease.
14. Loosen the nut until it's flush with the top of the threaded stud and then hit it with a steel mallet (not a hammer although it will due) until it releases. (Avoid penetrating lubricant unless it won't release).
15. Using a 38mm hand wrench ($13 at Northern Hydraulics) , loosen the nut holding the tie rod assembly to the steering module. Switch to a smaller locking jaws plier once released to complete the removal. (A 38mm wrench is a long beast that needs a lot of room to maneuver.) A 12" Crescent wrench is not big enough to span 38mm.
16. Remove the nut from the outer tie rod at the hub (BMW calls this a swivel bearing (???)
Clean out this mating surface so it is free of rust, oil, grease, etc.
17. Now lay the removed tie rod assembly on the ground to take measurements. I used a $10 Northern Hydraulics caliper to measure as shown:
18. Assemble the new tie rods, placing the bellows and quick release clamp on the shaft before screwing the outer tie rod onto the inner tie rod.
19. Using your measurement from the old assembly, match to the new and tighten the tie rod shaft nut securely.
20. Clean up the steering rack gear and grease it.
21. Remove the old O-Ring and replace with the new one.
22. Now install the new tie rod assembly by barely securing the ball joint end into the wheel hub assembly.
23. Now carefully line up the inner tie rod nut with the steering module and tighten. (This is a bit cumbersome since the bellows wants to cover the nut area.)
You can turn the wheel hub assembly by hand inwards towards the vehicle to obtain the needed distance)
24. Take your time, and make sure not to cross thread the nut into the steering module. Now take your 38mm wrench and tighten until no play is remaining. (Should be torqued to 81 lbs but I couldn't measure since a torque wrench cannot be used).
Look for the area on the tie rod that you can grip with a locking or handheld jaws type pliers while torqueing either the inner or outer nuts as shown:
Remember that the car will need an alignment and the outer nut will be loosened to make adjustments. It's the 38mm, inner nut, that will not be messed with at alignment time.
25. Now spray the o-ring area on the steering module with Sea Foam or other penetrating lubricant.
26. Force the rubber bellows over the o-ring and make triple sure that it is fully and correctly seated. The Sea Foam greatly aids in making this possible; so use it.
27. Now take the ear clamp and place it over the bellows and cinch it into place using a crimper (Oetiker is what I used) to lock the rubber bellows in place and prevent any dirt from entering. (The gap in the crimp should be less than 1mm) This is a critical step to preventing dirt from wearing out your steering mechanism.
28. Now tighten the nut on the outer tie rod using a 21mm box wrench,T40 socket; and holding the nut with the 21mm box wrench, tighten with the T40 socket (counter clockwise) until it will not take any more torque. Now switch to your torque wrench and 21mm socket and finalize to 122 lbs of torque.
29. Reinstall under belly panels and you're done.
Last edited by paran; 06-17-2013 at 11:59 AM.


 06-16-2013, 02:49 PM
#5
Senior Members
Join Date: Nov 2008
Location: Houston, TX
Posts: 670
Likes: 0
Received 0 Likes
on
0 Posts
My Ride: 2006 530i, Jet Black, Tan, Premium, Steptronic
Thanks to the OP for the excellent write-up.
I have several things to add:
Use blue Loctite on the threads of the tie rod that screw into the steering rack.
The new parts were so tight that I was unable to screw the entire tie rod assembly in as one piece. I removed the old parts, measured them as per the above post, and then set-up the new parts with the same measurement, setting the new nut in place with blue painter's tape. Take off the outer end and the then screw the inner tie rod into the steering rack. If you turn the wheel to the outside of the car then there is plenty of room to get the threads started.
Alternatively, you can count the number of turns it takes to get the old outer tie rod separated and then twist the new part on the same number of turns.
I bought a 38mm crow foot wrench for $10 so that I could use a torque wrench for reassembly. The crow foot wrench permitted the use of my 1/2" ratchet and 18" breaker bar.
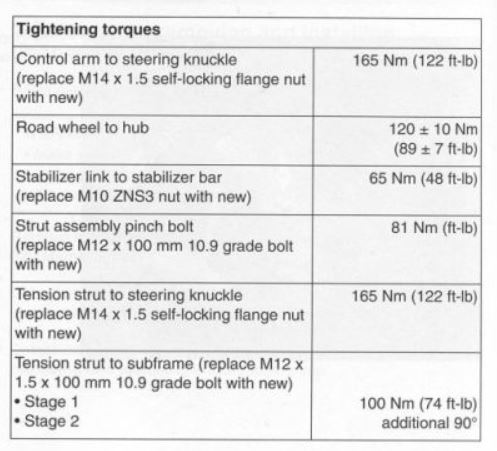
The torque values are-
1) lock nut to tie-rod ends- 51 Nm (38 ft-lb)
2) Tie rod ball joint to steering knuckle- 80 Nm (59 ft-lb)
3) Tie rod to steering rack- 110 Nm (81 ft-lb)
You need a 21mm wrench to set the lock nuts and remove the nut connecting the tie rod to steering knuckle if you don't have an impact and the joint is very loose (like mine was). A flex-head ratcheting wrench would be very useful.
I bought Febi parts from RMEuropean.com for a total price of $100 for both sides. The parts were manufactured in Spain.
The Lemforder bellows kit did not include an o-ring. I greased the old o-ring and left it in place.
I used Valvoline VV986 synthetic grease. You barely need any grease for this repair so buy the smallest amount that you can.
I haven't decided where I am going to get the car aligned. I have some other suspension work to do so I am pondering the purchase of a lifetime alignment from Firestone. At a cost of $200 the alignment will pay for itself after the alignment is done twice.
I have several things to add:
Use blue Loctite on the threads of the tie rod that screw into the steering rack.
The new parts were so tight that I was unable to screw the entire tie rod assembly in as one piece. I removed the old parts, measured them as per the above post, and then set-up the new parts with the same measurement, setting the new nut in place with blue painter's tape. Take off the outer end and the then screw the inner tie rod into the steering rack. If you turn the wheel to the outside of the car then there is plenty of room to get the threads started.
Alternatively, you can count the number of turns it takes to get the old outer tie rod separated and then twist the new part on the same number of turns.
I bought a 38mm crow foot wrench for $10 so that I could use a torque wrench for reassembly. The crow foot wrench permitted the use of my 1/2" ratchet and 18" breaker bar.
The torque values are-
1) lock nut to tie-rod ends- 51 Nm (38 ft-lb)
2) Tie rod ball joint to steering knuckle- 80 Nm (59 ft-lb)
3) Tie rod to steering rack- 110 Nm (81 ft-lb)
You need a 21mm wrench to set the lock nuts and remove the nut connecting the tie rod to steering knuckle if you don't have an impact and the joint is very loose (like mine was). A flex-head ratcheting wrench would be very useful.
I bought Febi parts from RMEuropean.com for a total price of $100 for both sides. The parts were manufactured in Spain.
The Lemforder bellows kit did not include an o-ring. I greased the old o-ring and left it in place.
I used Valvoline VV986 synthetic grease. You barely need any grease for this repair so buy the smallest amount that you can.
I haven't decided where I am going to get the car aligned. I have some other suspension work to do so I am pondering the purchase of a lifetime alignment from Firestone. At a cost of $200 the alignment will pay for itself after the alignment is done twice.
Last edited by txag_530i; 06-18-2013 at 08:19 AM.

 06-18-2013, 07:57 AM
#8
Senior Members
Join Date: Nov 2008
Location: Houston, TX
Posts: 670
Likes: 0
Received 0 Likes
on
0 Posts
My Ride: 2006 530i, Jet Black, Tan, Premium, Steptronic
^^^^^
Those torque values are not for the tie-rod ends.
I copied the torque values out of the Bentley manual, which are usually pretty accurate. I did not look them up in TIS.
I had the car aligned at Southwest Alignment Services in Houston. They are an independent shop that does nothing but front-end work and alignments. It cost $65 and the car was in and out in an hour. They even tuned the television to a kids show for my 6-year old daughter.
Last edited by txag_530i; 06-18-2013 at 08:26 AM.
06-21-2013, 09:29 AM
#9
New Members

Join Date: May 2013
Location: TX
Posts: 11
Likes: 0
Received 0 Likes
on
0 Posts
My Ride: 550i
Any symptoms that caused you to change the tie rods and does it gives you any improvement after the change? I'm having some vibration issue but only when the car is cold and I'm suspecting its the tie rods or the bushings so thinking about do this....Thanks for the writeup!
06-24-2014, 05:41 PM
#10
New Members

Join Date: Aug 2013
Location: San Ramon, CA
Posts: 144
Likes: 0
Received 0 Likes
on
0 Posts
My Ride: 530i
Model Year: 2006
Engine: N52
Great write up and my next to-do project.
As to "symptoms" I can say that after replacing the front shocks and springs I noticed slight movement familiar from an earlier 7 series.
I replaced the lower control arm bushings with urethane bushings from www.armstrongdistributors.com. Jon Piha there is fantastic! Highly recommended.
They made an enormous difference, and I highly recommend, but I heard some metallic clunking and felt slight movement from crowns in road.
That told me it was tie rod ends, and today that was confirmed.
So hchc I am sure you will find that all 4 tie rod ends are shot! Do them or have them done.
This is my next project and many thanks to Paran and following comments for the excellent write up and suggestions.
As an addendum I have found that part quality is important. There is cheap chinese-made junk. Watch out.
www.rmeuropean.com has Febi and more.
I think I would rely on them.
Last edited by gcalo; 06-24-2014 at 08:13 PM.